Ready to cut energy bills and boost home value? This short guide gives clear, practical tips for local homeowners who want trustworthy information before they commit.
Most families save about $2,082 per year after switching to clean power, but getting a quality installer can take time. Research helps you find a team with real experience and strong customer reviews.
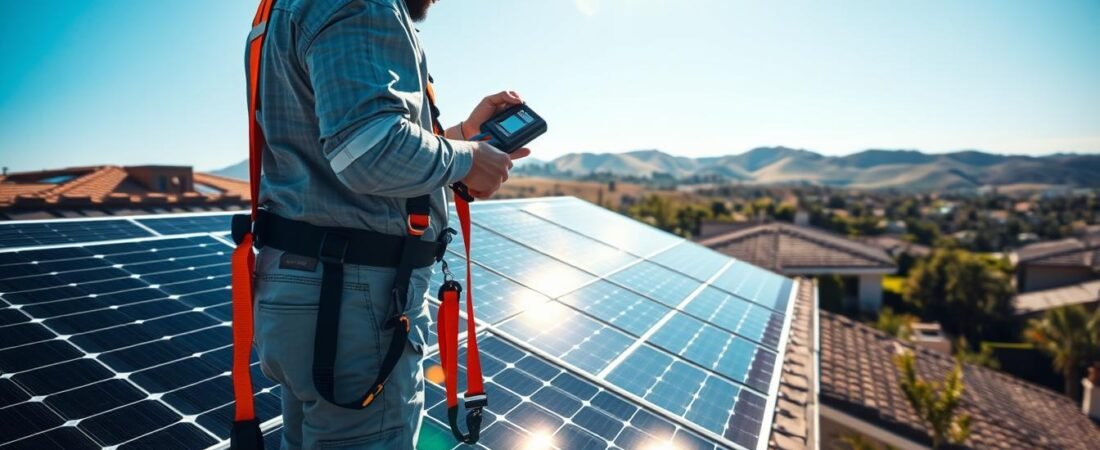
Day-of work usually covers racking, wiring, and placing panels and inverters, and a town inspector signs off for interconnection. Expect a typical system to take one to three days, depending on roof complexity and equipment.
Pro tip: Always request multiple quotes to compare pricing, service, and warranty options. Use trusted resources and ask about long-term cost, products, and support to protect your investment.
For more detailed service options and local expertise, check this provider services page to begin planning with confidence.
Key takeaway 1: Careful research and multiple quotes save money and hassles.
Key takeaway 2: A qualified installer and good warranty maximize long-term value.
Understanding the Benefits of Solar Energy
Generating your own clean energy can shrink or even eliminate recurring electricity charges. That simple shift changes how a household spends on power each month and over many years.
Why homeowners choose this option:
- Generate on-site energy to reduce reliance on the grid and cut monthly electricity costs.
- Many homeowners report strong financial returns and community benefits from greener choices.
- Producing clean solar power helps offset your carbon footprint for long-term stability.
- Modern solar panels are efficient, so you get more energy from less roof space.
- Over a 20-year span, a typical household could see roughly $25,000 in savings.
These advantages make switching to renewables a practical step for U.S. homeowners who want lower bills and a smaller environmental impact. Start by comparing options and warranties to ensure lasting value.
Assessing Your Roof for Solar Potential
Before you choose equipment, map which roof faces get the most daylight across seasons. A clear view of daily sun and your roof layout will shape performance expectations and costs.
Sunlight Exposure
Track direct sunlight through the day to estimate how much energy your system can produce. Orientation, nearby trees, and chimneys change output by season.
Tip: high-efficiency monocrystalline panels cost more up front but can increase lifetime savings if roof space or shade limits output.
Roof Configuration
Check roof angle, usable area, and structural soundness before any installation. These factors determine how many panels fit and where they go.
- Evaluate layout to find the best array placement and avoid future shade problems.
- Gather accurate information about rafters and decking to confirm weight support.
- Have a pro assess your roof so every panel captures maximum daily sun and stays secure for years.
Navigating Solar Panel Installation North Tustin Projects
Begin with a professional walk-through—virtual or in person—to shape an accurate work plan. The installer will inspect your roof, measure shade, and note electrical access so the chosen system fits your home.
Permits and paperwork matter. Good companies handle permit filings, order equipment, and submit required documents so you avoid delays.
Expect clear timelines. Most site prep and array setup take one to three days, depending on roof complexity and chosen products.
“Trustworthy installers keep customers informed at every step so the project runs smoothly.”
Get multiple quotes from reputable companies to compare service, warranties, and expected energy output. Experienced teams explain products and give an honest estimate of time and cost.
- Schedule a detailed site visit.
- Confirm permit handling and equipment ordering.
- Choose an installer with strong communication and experience.
Tip: Clear communication makes the whole transition easier and boosts long-term confidence in your new system.
Comparing Quotes from Top Solar Companies
Comparing detailed quotes makes it easier to judge real value, not just sticker price. Ask for itemized bids so you can compare products, labor, and financing side by side.
Customer Review Scores
Start by checking independent reviews and star ratings. EcoWatch analyzed over 1,500 providers and highlighted the top 15 based on customer review scores and service area.
“Companies that offer financing assistance scored higher in rankings.”
Service Area Coverage
Confirm a company’s local footprint. Firms familiar with local permitting and utility rules move faster and avoid costly delays.
Pricing Transparency
Good quotes list equipment, labor, and permits. A clear price helps homeowners avoid surprises and compare true cost across companies.
- Get at least three quotes to compare pricing and equipment.
- Prioritize high review scores and clear warranty terms (industry standard: 25 years product/performance).
- Look for providers that offer financing or battery options to ease up-front cost.
Evaluating Warranty and Workmanship Coverage
Warranty terms tell you how long a company will fix defects and stand behind its work. A complete offer lists product, performance, and workmanship protection in plain language.
Industry standard means 25 years for product and performance and usually 10 years for workmanship. A perfect score goes to companies that extend all three protections to 25 years.
Why workmanship matters: It guards your roof and system from installation errors that can cut output or cause damage.
“Ask for written warranty details and any transfer terms before you sign.”
- Confirm the contract names both the panels and the installer and lists coverage length.
- Check whether battery or energy storage is included in the warranty information.
- Choose companies with clear pricing that includes warranty and service support.
| Coverage | Industry Standard | Perfect Offer | Why It Matters |
|---|---|---|---|
| Product Warranty | 25 years | 25 years | Protects equipment defects |
| Performance Warranty | 25 years | 25 years | Ensures expected output over time |
| Workmanship Warranty | 10 years | 25 years | Covers installation errors and repairs |
| Transferability | Varies | Included | Maintains home value and buyer confidence |
Maximizing Savings with Federal and Local Incentives
You can stack nationwide and regional programs to reduce the payback time on your energy upgrade. The federal investment tax credit (ITC) currently lets homeowners deduct 30% of the cost of a full system from their federal taxes.
Federal Tax Credit Details
The 30% credit applies to the total cost of equipment and labor for a qualifying system. This deduction can drop your initial price substantially and improve your year-one cash flow.
Tip: combining the ITC with regional rebates and utility programs can shorten your payback period and raise lifetime savings. Many homeowners see roughly $25,000 in savings over 20 years when incentives are used optimally.
“Work with a trusted company that knows local rules so you capture every eligible incentive.”
- Federal incentives reduce upfront cost and lower annual tax bills.
- Local programs and rebates may stack with the ITC for extra savings.
- Experienced installers and companies often help file required paperwork.
- Don’t forget incentives for battery storage if you add one to your system.
For a practical list of regional opportunities, review this local incentives guide to see which rebates and programs apply to your home.
Choosing the Right Solar Equipment for Your Home
Choosing the right equipment starts with defining how much energy your household truly needs.
Balance efficiency and cost. Monocrystalline options deliver higher output and suit tight roofs, but they cost more. Polycrystalline is a middle ground. Thin-film is flexible for curved surfaces, yet usually yields less power.
Ask companies the right questions. Request clear information on expected output, warranty length, and component brand names. Confirm that the offered system and inverter meet U.S. safety and performance standards.
“Invest in quality modules and a trusted inverter to maximize lifetime savings.”
- Match high-efficiency panels to limited roof space.
- Discuss battery options for added energy independence.
- Have a professional evaluate trade-offs between cost and long-term performance.
Final tip: pick a company with transparent specs and strong customer support to keep your investment stable for years.
Preparing for the Installation Timeline
Expect a few moving parts—permits, deliveries, and inspections—before your new system can power the home.
Permitting and Documentation
Your chosen installer will usually handle permit paperwork and local filings. That saves time and reduces errors.
They will submit plans, electrical diagrams, and product specs to the town so the project meets local rules. Keep copies of all quotes and warranty documents for your records.
System Inspection and Interconnection
Once the crew finishes roof prep, wiring, and array setup (often one to three days), a municipal inspector will visit to verify safety and code compliance.
After that sign-off, the utility company reviews the paperwork and grants approval for interconnection. Only then can the system be energized.
“Experienced installers keep customers informed at every step to avoid surprises.”
- Installer coordinates delivery of products and schedules site work.
- Inspections ensure safety, performance, and permit compliance.
- Utility approval finalizes interconnection so your home gets clean power.
| Stage | Typical Time | Who Handles It |
|---|---|---|
| Permitting | 1–3 weeks | Installer / Company |
| On-site Work | 1–3 days | Installer Crew |
| Municipal Inspection | 1–2 weeks | Town Inspector |
| Utility Interconnection | 1–4 weeks | Utility Company |
Conclusion
Choosing trusted pros yields better performance and fewer surprises. Work with one of the top solar companies and the best solar teams to make sure your panel installation goes smoothly and meets expectations.
Take advantage of incentives and tax credits to cut upfront cost. Ask each company for clear warranty and workmanship terms so customers know how long their system is covered.
Choose quality equipment and consider a battery if you want backup power. With the right team and a solid plan, you’ll enjoy reliable solar power and lower bills for years.