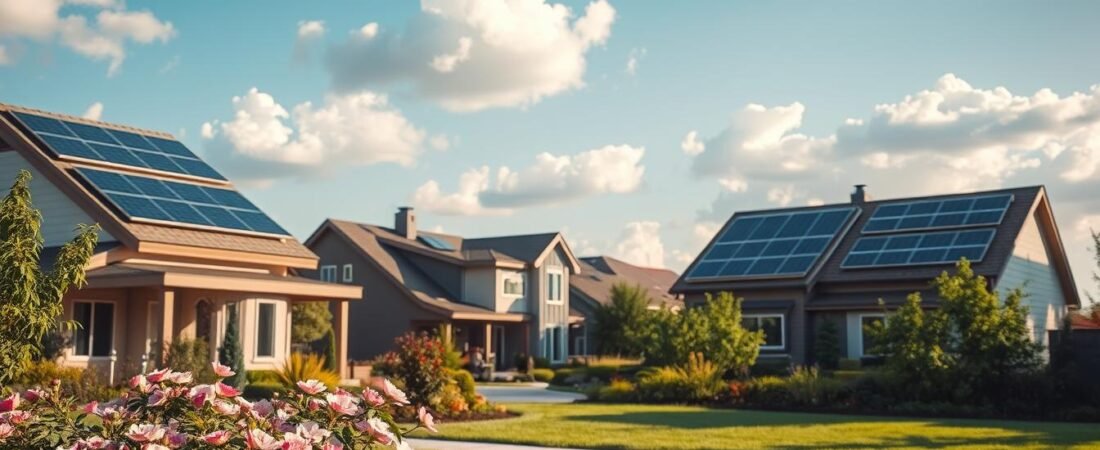
Thinking about clean power for your home? This guide walks you through clear, useful information to help decide if a rooftop system or a shared option fits your needs. Lakisha Harris’s move into a solar-equipped house in Accokeek, Maryland, as part of the U.S. Department of Energy’s Summer of Solar, shows real-world benefits.
The Department of Energy’s Solar Energy Technologies Office (SETO) offers resources to help Americans weigh costs, savings, and local rules. Since 2008, hundreds of thousands of systems have been placed across the country, so options and financing have improved for many homeowners.
There is no single answer for every property. This short guide will outline practical choices, from rooftop systems to community solar programs, and point you to the best resources so you can make an informed installation decision.
Evaluating Your Home for Solar Energy
A clear picture of your home’s energy use makes planning a system simpler.
Start with an energy audit. A professional home energy audit pinpoints heat loss, inefficient appliances, and lighting that raise your bills. Fixing these items first lowers the power you must produce and can cut the overall cost of the system.
Check your roof and structure. Building officials often require a structural analysis to confirm the roof can bear added weight and wind loads. Most experts recommend installing panels only if the roof has at least 15 years of life left to avoid premature rework.
Practical steps to prepare
- Run an audit to get precise information on use and efficiency opportunities.
- Weatherize, add LED lighting, and seal leaks to reduce demand.
- Ask your utility and installer about local rules and solar rights that affect access.
| Check | Why it matters | Next step |
|---|---|---|
| Home energy audit | Shows where power is wasted | Schedule a professional assessment |
| Roof age & strength | Prevents future repairs and safety issues | Get a structural review and roof estimate |
| Local rules & utility access | Can limit or enable system placement | Contact utility and installers for guidance |
For practical guidance on whether your home qualifies and how to prepare, see this helpful assessment guide.
Assessing Your Solar Potential and Energy Needs
Knowing when and where your property catches sunlight is the first step to smart system sizing. Use professional tools such as the Solar Pathfinder or Solmetric SunEye to calculate the Total Solar Resource Fraction (TSRF) for your roof.
Check orientation and shade. Southern exposure is ideal, but a west-facing roof can still produce about 87% of a south-facing output. Aim for clear access between 9am and 3pm to maximize power across the year.
Account for structural limits and weight. Evacuated tube arrays weigh roughly 175 lbs while flat panel collectors can reach 200–250 lbs. A building review helps prevent surprises and hidden cost from roof reinforcement.
- Have installers review your past electricity bills to calculate annual energy use in kWh.
- Use TSRF measurements to estimate real production and likely savings.
- Ask your installer about local utility rules and available resources for system design.
Exploring Options for Residential Solar Panel Installations
There are several ways to access clean power — each option affects your upfront cost and future returns differently.
Purchase with cash or a loan gives you ownership. You can claim federal tax credits and increase your home’s market value. Owners also benefit from long‑term savings when the system reduces monthly energy bills.
Community Programs and Shared Arrays
Community solar programs let customers buy or subscribe to a shared system. This is ideal if your roof is shaded or you rent. Participants get credits on their utility bill based on their share of production.
Leases and Power Purchase Agreements
Leases and PPAs offered by solar companies reduce upfront cost. With a lease you pay a fixed monthly fee for equipment. With a PPA you buy the power the system produces at an agreed rate.
- Buying gives you tax and equity benefits.
- Community solar fits those who cannot install panels on their property.
- Leases and PPAs lower initial investment but may limit future savings.
- Net metering can return credit for excess generation to offset bills.
Selecting a Qualified Solar Contractor
Choosing the right contractor makes the difference between a smooth project and costly delays. A good installer guides permits, tax paperwork, and system sizing so your home gets reliable, long‑term energy benefits.
Vetting Credentials and References
Verify certifications: Look for NABCEP credentialing. This is the industry standard and shows the installer follows best practices for safety and performance.
Get multiple bids. Obtain at least three written proposals to compare cost, expected output, warranties, and equipment brands. That helps you spot low bids that cut corners.
- Ask for local customer references and visit nearby systems when possible.
- Check your state electrical board for licenses or complaints against the company.
- Consider Solarize or group purchase programs to access vetted companies and better incentives.
| Check | Why it matters | How to verify |
|---|---|---|
| Certification | Shows installer competence | Confirm NABCEP or equivalent |
| References | Reveals real customer experience | Call local customers and view systems |
| Licensing & complaints | Ensures legal, safe electrical work | Search state electrical board records |
Understanding the Installation Process
A practical installation plan ties site checks, permits, and wiring into one simple timeline.
Mounting begins on the roof. Installers secure a racking system so the panels face as close to south as possible to boost clean energy production. The crew checks flashing and roof anchors to protect your shingles and building envelope.
The inverter is installed near the main breaker. It converts the system’s DC power into AC your home uses. A DC disconnect switch and a utility meter are placed nearby for safety and monitoring.
For water heating, thermal collectors use pipes to move heated fluid to a storage tank next to the water heater. Fire marshals may review plans to ensure emergency access paths on the roof.
“A clear, safe hookup from racking to meter is the key step before your system goes live.”
Final steps:
- Inspectors and your utility sign off on the connection.
- Your installer commissions the system and explains operation to you.
- Once approved, the system is turned on and begins offsetting your energy bills.
Navigating Financial Incentives and Tax Credits
Knowing which tax breaks apply makes your investment in clean power far more affordable. The federal Investment Tax Credit (ITC) currently offers a 30% tax credit for systems installed from 2022 through 2032.
Plan by year. The credit steps down to 26% in 2033 and to 22% in 2034. Timing your project can increase savings and lower the overall cost of an installation.
Use trusted resources. The Database of State Incentives for Renewables and Efficiency (DSIRE) lists state, local, and utility programs that stack with federal credits. Many installers will help file paperwork to claim these benefits.
Note: if you lease or sign a Power Purchase Agreement you usually do not qualify for the federal tax credit because you do not own the system. Also, there is no cap on the amount you can claim for the federal credit.
| Incentive | What it covers | How to access |
|---|---|---|
| Federal ITC | 30% of eligible costs through 2032; 26% in 2033; 22% in 2034 | Claim on federal tax return; installer can assist |
| State & local rebates | Upfront rebates or performance payments | Search DSIRE for programs and rules |
| Utility credits | Bill credits, net metering, or production payments | Contact your utility for enrollment details |
Quick tips: Check federal and local incentives, ask your installer for help, and weigh ownership vs. lease options to get the best return on your investment.
Conclusion
Start small, and build with confidence. Taking control of your home’s energy future begins with a few simple, informed steps.
Begin with an honest assessment of efficiency and sun access. Then work with a qualified installer to handle permits, wiring, and paperwork so the project runs smoothly.
Claim incentives. Federal tax credits and local programs cut costs and improve long-term returns. Weigh buying against joining a community option to find what fits your budget and goals.
If you want to learn more about our team or how we work, find an installer at True North to get tailored guidance and next steps.
With clear steps and good partners, you can reduce bills and help create a cleaner future for your neighborhood.