Ready to hit the road and stay powered? This short article lays out a clear way for beginners to set up a reliable system on their vehicle roof. You will learn the basics of choosing components, planning placement, and managing energy while camping off-grid.
Planning takes time, and a smart approach makes it easier to install solar panels safely and effectively. Whether you plan to install solar yourself or hire a pro, understanding the core ideas helps you avoid costly mistakes.
We cover the essentials of solar power, wiring, and charge management in simple steps. By the end, you’ll feel confident to assess equipment, protect your roof, and keep your gadgets and fridge running during adventures.
Key takeaways: Know your power needs and plan placement carefully.
Decide early if you will install solar panels yourself or hire help.
Understanding Your Caravan Energy Needs
A clear tally of amps per appliance helps you pick the right battery capacity and charger.
Start by listing every appliance and how many amps it draws per hour. Multiply each amp value by the hours used in a 24-hour period to get daily amp-hours. This step gives a real picture of your power needs.
Tip: A small fridge often uses 1–3 amps per hour. HVAC can spike to 60 amps. Use those figures when you total loads.
Calculating Daily Power Consumption
Work in amp-hours (Ah) for clarity. A 100-Ah battery can, in theory, deliver 1 amp for 100 hours. Account for system efficiency and losses so you don’t under-size your setup.
Managing Battery Capacity
12V deep cycle batteries are common for mobile use. Most makers advise keeping AGM or Gel cells above 50% capacity to extend life.
| Battery Type | Usable Capacity (100 Ah) | Best For |
|---|---|---|
| Lead-acid (AGM) | ~50 Ah (recommended) | Budget setups, basic appliances |
| Lithium batteries | ~100 Ah usable | Higher output, longer life, no Peukert effect |
| Gel | ~50 Ah (recommended) | Stable in heat, careful charging needed |
Quick planning checks: a 200W system can recharge a 100-Ah battery in 5–8 hours in ideal sun. Always size your regulator and charger to handle the expected output and daily loads.
Essential Components for Caravan Solar Panel Installation
Begin with a checklist of the core parts you’ll need to turn sunlight into usable power.
What to expect in a kit: Most standard kits include two solar panels, a charge controller, mounting brackets, and the necessary cables plus electrical parts. Buying a complete kit helps ensure compatibility and reduces shopping time.
Make sure the panels you pick fit your roof footprint. Poor fit can create stress points and complicate the installation process.
Mounting brackets are critical. They secure the panels to the roof and absorb vibration from travel on uneven roads. Pick brackets rated for road use and the roof material.
Check cable gauge before you start. Thin cables can overheat and reduce the system’s output. Use the proper gauge for the expected current.
- Complete kit: quick, matched components
- Individual parts: flexible for upgrades
- Brackets: choose sturdy, travel-rated types
| Component | Why it matters | Typical spec |
|---|---|---|
| Panels | Generate DC power from sunlight | Two 100–200W modules common |
| Charge controller | Protects batteries and optimizes charging | MPPT preferred for efficiency |
| Brackets | Secure mounting and damp vibration | Aluminum or stainless, travel-rated |
| Cables & connectors | Carry current safely between parts | Correct gauge (e.g., 8–10 AWG) and weatherproof |
Selecting the Right Solar Equipment
Pick gear that matches your energy targets and travel habits to get the most from a mobile power setup.
Controller choice matters. An MPPT regulator extracts far more charge from panels than a PWM unit. MPPT is best when you want higher charging efficiency and better output in varied light.
Choosing Between MPPT and PWM Controllers
MPPT controllers track voltage and convert excess to usable current. PWM units are simpler and cheaper but lose efficiency on higher voltage panels.
Benefits of Lithium Batteries
Lithium batteries offer higher usable capacity and lighter weight. They handle deep discharge and deliver steady voltage under heavy loads.
Selecting Inverters
Use a pure sine wave inverter to protect sensitive appliances. A 3kW simultaneous load can demand 260+ amps, so size your battery and wiring accordingly.
| Component | Advantage | Typical Spec |
|---|---|---|
| MPPT regulator | Higher charging efficiency | 20–60A, suits varying panel voltages |
| Lithium battery | Full usable capacity, long life | 100–300 Ah, high discharge rate |
| Pure sine inverter | Safeguards electronics | Continuous 1000–3000W depending on load |
- Research products and get one that matches battery chemistry.
- Include a DC-to-DC battery charger to top up from the alternator when sunlight is low.
Preparing Your Caravan Roof for Mounting
Before any mounting work, make the roof surface ready so adhesives and brackets can do their job.
Start by washing the roof with soap and water to remove oils and grime. This step helps the adhesive bond and reduces the chance of loosening later.
For safety: always pair adhesive with mechanical fixing. Use screws and travel-rated brackets to resist vibration and strong winds.
On curved roofs, consider semi-rigid options that can be glued over a larger area. They reduce stress at edges and lower detachment risk.
“Consistent sealing around mounts and cable exits is essential to stop water ingress.”
When drilling for wiring, place a block of wood inside under the drill point to protect ceiling boards. After routing cables, seal every hole with a quality caulk gun to prevent leaks.
- Clean the surface thoroughly with soap and water.
- Use both adhesive and mechanical brackets for secure mounting.
- Choose semi-rigid panels for curved roofs when needed.
- Back drill holes to protect the interior and seal all penetrations.
Proper roof prep is the single most important step to ensure your solar array stays secure and watertight for years.
Wiring and Electrical Safety Standards
Before you connect any battery or inverter, know how voltage choices affect safety and cable size.
In Australia and many mobile setups, wiring must meet AS3001 standards for safety and certification. These rules require flexible cables, proper switches, and certified connections for habitable spaces.
Voltage matters. Moving from 12V to 24V cuts copper needs dramatically—24V delivers the same power with about one-quarter the cable cross-section. That reduces weight and cost while improving efficiency.
Practical Safety Steps
Keep batteries in a ventilated space and separate from living areas. Use a thermostat-activated fan if the compartment is tight to control heat and gases.
- Double-pole switching is required for all internal wiring to meet safety codes.
- Extra low voltage (
- Use a quality regulator to control output and protect batteries from overcharge.
- Have a professional electrician certify any 230VAC work and inverter connections.
“Proper wiring and ventilation prevent most common electrical failures in mobile power systems.”
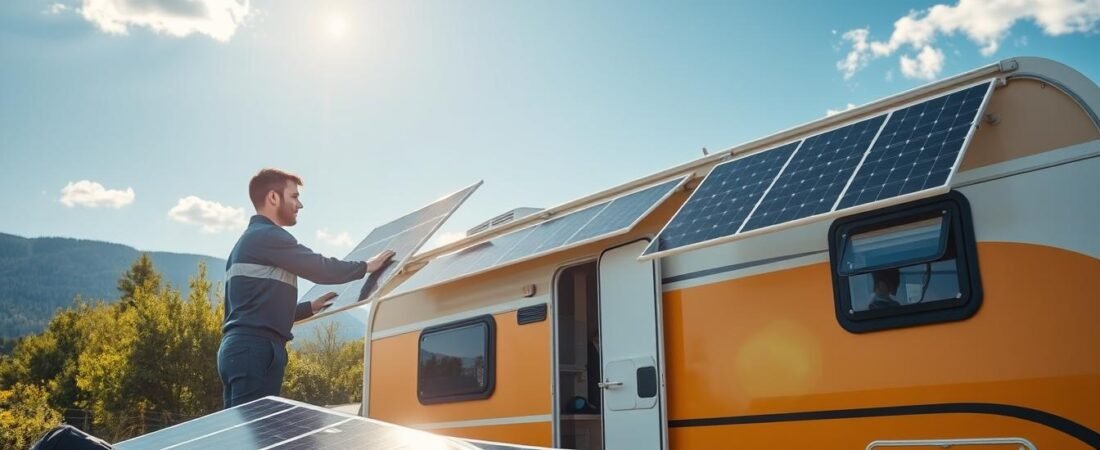
Mounting Techniques for Solar Panels
Secure mounting keeps your panels steady on the move and protects the roof below.
Mechanical fixing using screws into the panel alloy frame is the safest method to prevent modules from coming loose during transit. Use travel-rated fasteners and torque to manufacturer specs to avoid stress cracks.
Place panels squarely on the roof surface so each unit gets even sun through the day. Small misalignment can reduce daily output and cause wind lift at edges.
Run wiring through a single sealed roof entry point and use a proper gland to stop water ingress. Seal around brackets and cable exits with a compatible marine-grade sealant to protect the interior space.
Choose high-quality brackets that match your roof material and load rating. Robust supports lower vibration and withstand high-wind scenarios without deforming the surface.
- Fasten panels with mechanical screws into the frame for secure travel.
- Align each panel square to the roof to maximize exposure.
- Pass cables through a sealed hole and reseal after routing.
- Pick sturdy brackets rated for mobile use and check seals often.
Before finishing, double-check every seal and entry point. A final inspection after a short road test helps catch leaks or loose fasteners before they become costly problems.
For step-by-step guidance on how pros mount arrays on mobile roofs, see this install solar on a van or guide.
Testing and Optimizing Your Solar System
Testing your setup in stages helps catch wiring faults and keeps your battery healthy over time.
Begin with a visual check of all wiring and cable terminations. Confirm the regulator is connected to the battery first, then attach the panels.
Why this order matters: Connecting the regulator to the battery protects sensitive electronics from voltage spikes when the panels start producing power.
Monitor the output of the panels for the first 48–72 hours. Log voltage and amps at different times to see if battery capacity is replenishing as expected.
- Check regulator readouts and set voltage thresholds to match your battery chemistry.
- Verify inverter and battery charger settings so the charger uses the correct charge profile.
- Run appliance loads and note runtime to confirm the system meets daily needs.
“A methodical test run reveals simple faults before they become costly failures.”
| Test | What to check | Acceptable result |
|---|---|---|
| Wiring & connections | Polarity, tightness, correct gauge cables | No hot joints, correct voltage at battery |
| Regulator communication | Controller shows battery state and charging amps | Stable charge current under sun |
| Load test | Run fridge, lights, inverter simultaneously | Battery voltage stays above safe cutoff |
Optimize over time: Adjust regulator set points, trim loads, or increase battery amps if output is lower than expected. Small tweaks improve long-term efficiency and extend battery life.
Conclusion
Finishing your setup gives you the confidence to use off-grid power reliably on every trip.
This article aimed to help you size loads, pick the right products, and protect roof and wiring. Follow the steps and you can run a fridge and lights without surprise failures.
Choose quality components such as Victron Energy or Enerdrive and fit an MPPT regulator to get the best charging from your array. Keep batteries topped up and check connections often to extend lifespan.
For detailed guidance on how to install solar panels and pre-wire your vehicle, see this guide on choosing and installing caravan solar panels.
Safe travels: maintain your system, inspect seals and mounts regularly, and enjoy the freedom of reliable mobile power.